Counter
Pseudocode
- Declare and Initialize a variable
counterto zero. - When the A button is pressed incrament our varable by one and display a + sign and clear the screen.
- When the B button is pressed decrement our varable by one and display a - sign and clear the screen.
- When the micro:bit is shaken display the current value for 1 second and then clear the screen.
Our Program
- Create a new program
- In the variable section of our toolbox, click the ‘Make a Variable’ button. and call it ‘counter’
-
Drag and drop the
setblock into theon startevent, change the drop down to ‘counter’. It should look something like this: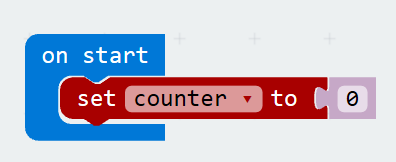
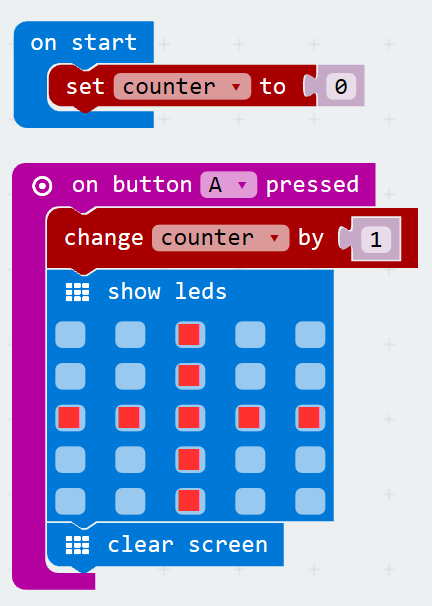
- Drag and drop the
on button A pressedevent into our program. - Add a
changevariable block into our event, associate it to the ‘counter’ variable we created and the ‘by’ value to 1 - Now display a ‘+’ sign, using the ‘show leds’ basic block.
-
And finally a clear screen basic block.
- Great, we are half way there, now we need to write the B button event. We could start from scratch, but lets ‘duplicate’ the A button event, and change a few things. To duplicate it, right click on the A button event and select duplicate.
- Now you should have two, but one of them will be grayed out. Using the one that is currently grayed out, change the event to map to the B button, with the dropdown on the event.
- Additionally, change the plus sign in the show leds block to be a minus sign.
-
Next change the
changebrick from a by value of ‘1’ to ‘-1’. When you are done you should have code that looks like this. Test it out in the simulator.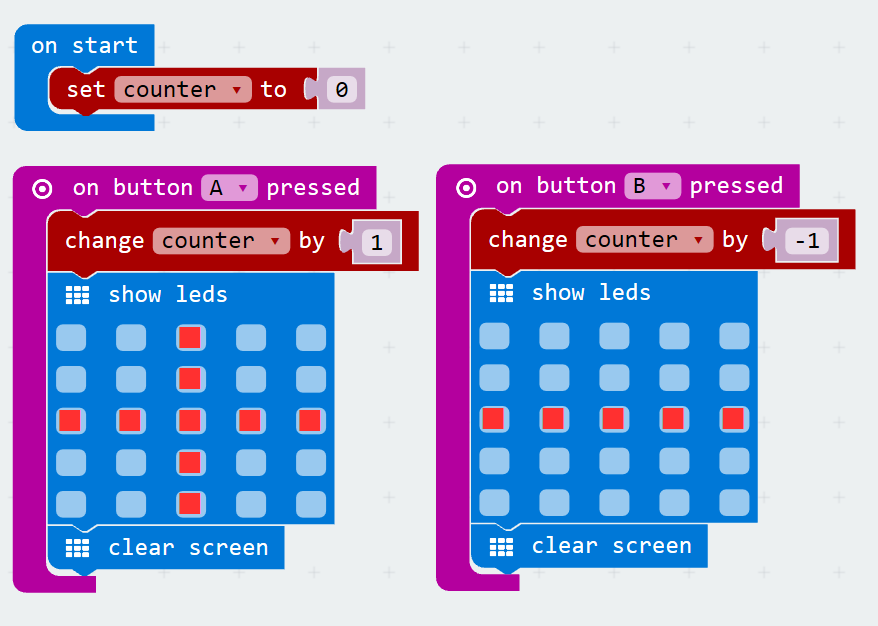
- Ok, now for our last requirement lets display the current value in counter when the micro:bit is shaken. Lets start by adding the
on shakeevent. - To that event lets display the value in counter using a
show numberbasic block and the countervariableblock. - We now need to wait for one second and then clear the screen. To wait we use the
pausebasic block. It time is set in milliseconds, so for 1 second we need to set it to 1000. -
Now we can add the clear screen command. Our
shakeevent should look something like this: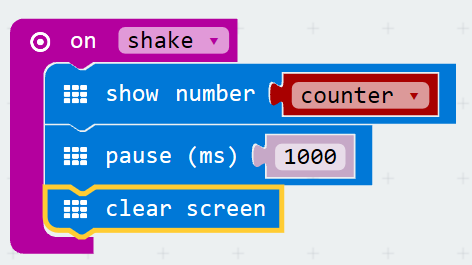
- Try our app out on the simulator, if everything looks good, lets name our app, save and download it to our micro:bit.